Tuesday 31 May 2016

Reflection

Reflection


What I have learned:
  • Metal Shaping
  • Mechanical technology and applications
  • Human factors – working with interdisciplinary students
  • Luminaires and optics
  • Common methods with software demonstration
  • Software applications (123D Make, 123D Catch & Mesh Mixer, Adobe Illustrator)
  • Applying lighting technology by application
  • Lighting regulatory issues
  • Developing and working with tool specifications

During this workshop arise some themes for future development such as: strengthen modelling techniques understanding software for better suited for the integration of 3D lighting architectural design, creating the possibility for achieving real photometric object. This course provides an opportunity for me to think about what I did wrong and  what the benefits were. This can be done through building on experiences from the workshop for greater improvements on the metal shaping. 

Limitations
We gain the ability to better choose an object design that is appropriate for the workshop application and is relating to our disciplinary field. In this case I have chosen a camera. There are, however, a couple limitations with this chosen object. It had no spherical surface which was hard to work with and had many angular edges which complicated the shaping and moulding process. 

I believe this limitation can be overcome by creating a smaller surface area for the object because wrapping the entire object with one single sheet created many problems. Example problem areas would include, among others, large gaps, angular surface and sharp edges.


Found Object
That is why I would have chosen an artificial lighting such as a light bulb if I was given a second chance. The atmosphere consists of the general character, related to the psychological mood that light creates. Many times people experience the space as boring, private, public, cheerful etc. only because of lighting influences. The consideration of spatial is the possibility to define the physical room: volume, distance, proportions and orientation. Depending on the light in a space we can perceive its volume as huge, as small, open and crowded. The perceived extension can also change a lot from an airy to a cramped space. Even the orientation is influenced by lighting; because how you find your way in the space can be well determined by the light present there.
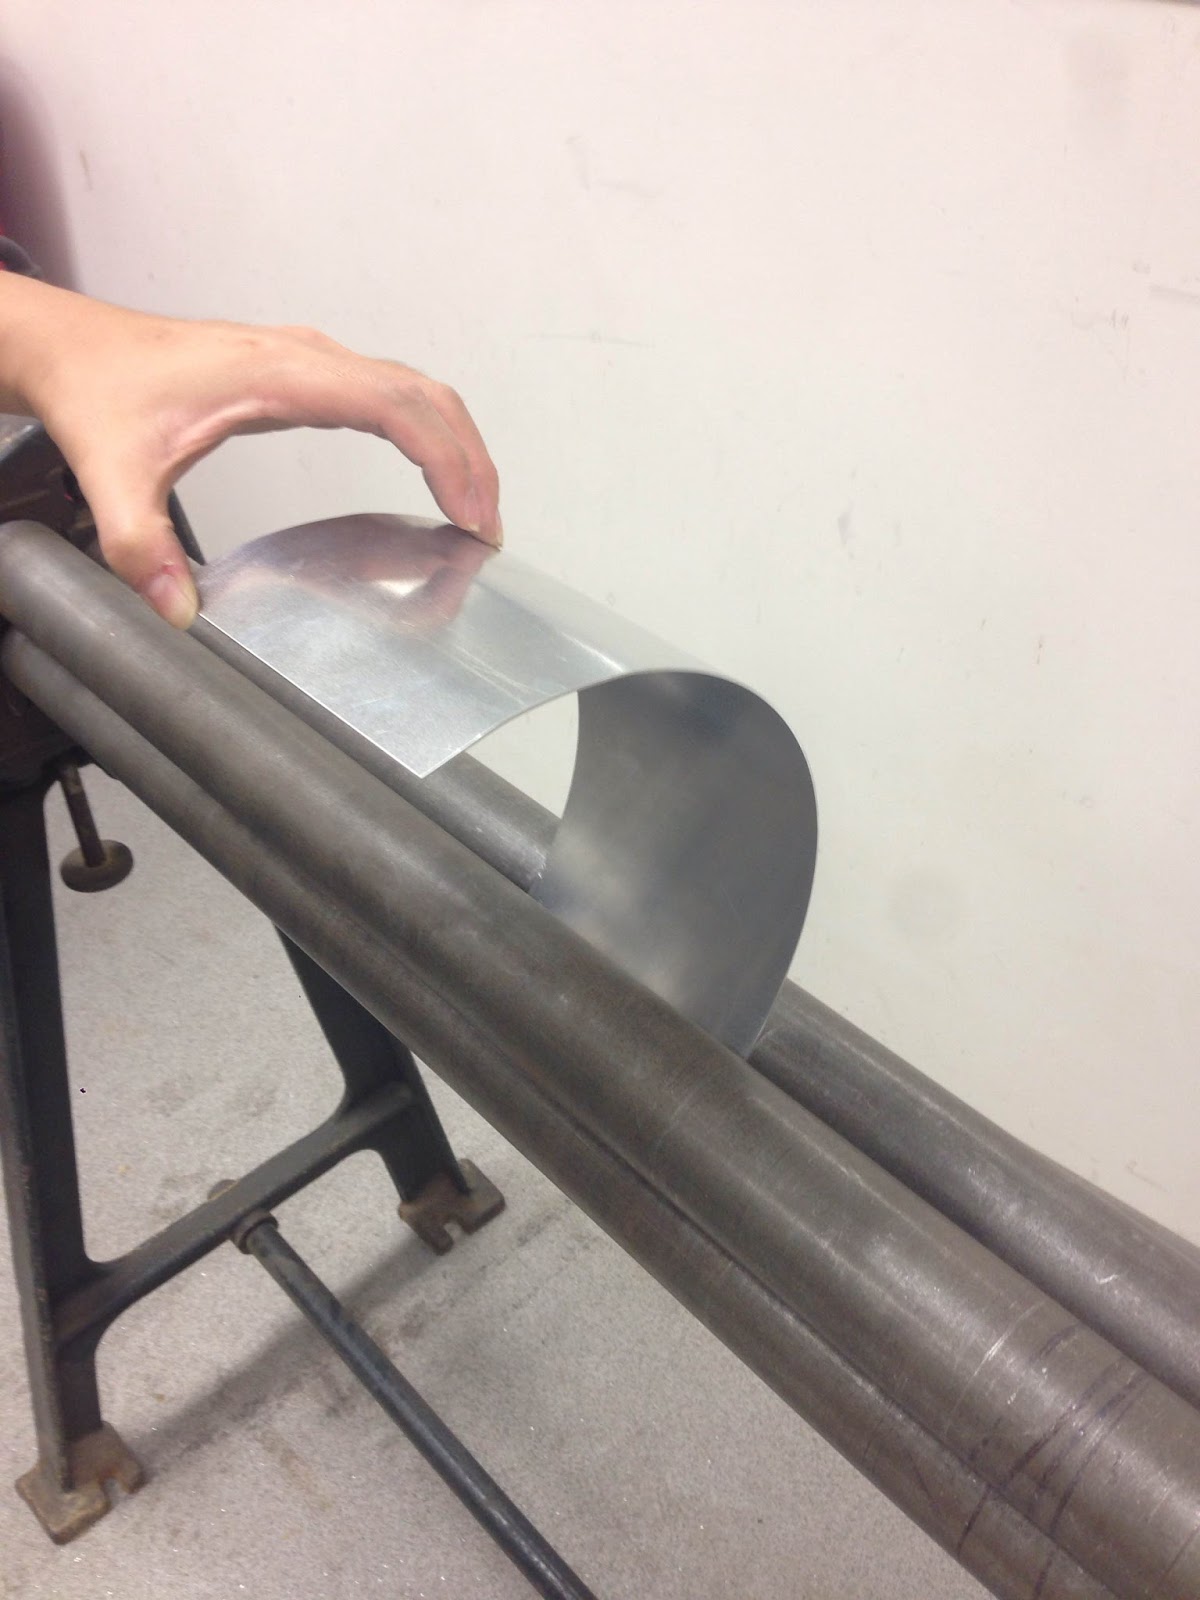

Before Hammering
Identify all staff involved with the process. It’s really important to get a cross section of staff that is involved which could assist you in the process.

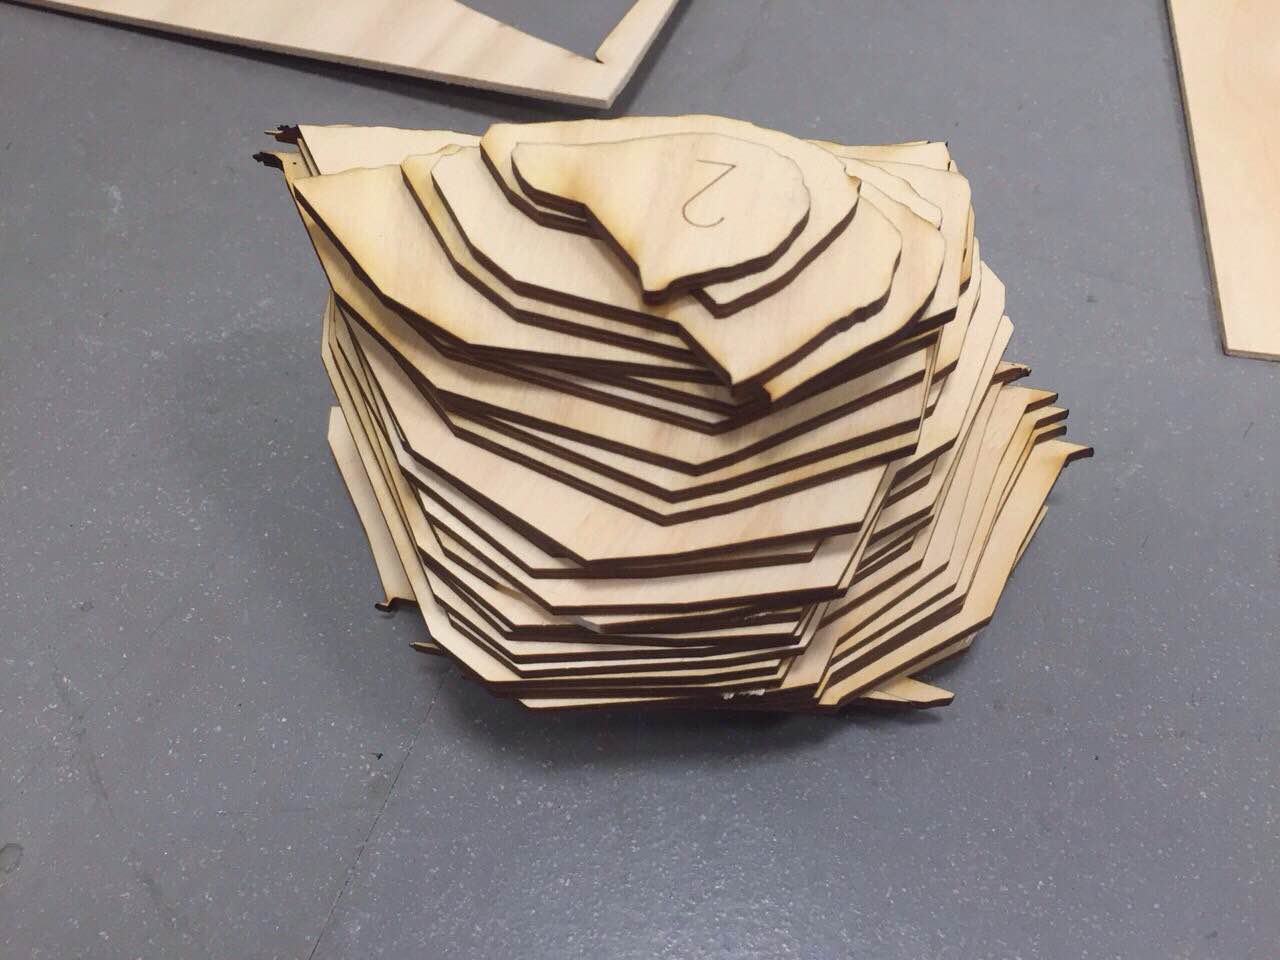
Buy materials. You’ll need lots of metal sheeting as you will have a few fail attempts which is nice to have extra good quality aluminium sheets available at hand. Some plywood that comes in 1.6mm or 3mm  for laser cutting which is available at the front desk. Whiteboard pens or

Ask for help if necessary. Explain to staff what process you are looking at and what you want to achieve and they are  happy and eager to help with any problems arising. It will make them feel more comfortable. Let them know they’ll be needed as early as possible.

The goal has always been to maintain a consistent and correct mould model of how I intend to begin this process, so that it could be used to guide others with simple steps that define appropriate behavior and techniques to achieve similar results, rather than to create an artificial model that would be limited to the constraints originally imagined when the work began.

Fun learning environment
What I like about the workshop provides participants with practical guidance, hands on experience, and information about the tools and resources that are available to help them create a positive learning environment.  Throughout the workshop, participants are encouraged to discuss, interact and problem solve while participating in physical activities such as hammering, shaping and moulding whilst applying workshop tools and techniques. the physical workshop and environment is also important for team working and individual working

The workshop was an experience in itself – not only did we learn about tools to promote creativity both individually and within interdisciplinary fields but we also got to actually practice the techniques and experience obtained from fabrication labs which  helped improve the outcomes of the metal sheet generation session.

From the workshop, I’ve learned techniques to:
§  help create an optimal environment for idea generation
§   encourage people to think creatively and generate approaches
§  help make tough decisions using the unconscious mind 
§ appropriate software available to use 

It is important to implement what you learn from the practical inductions when you get back to the workshop – so less than 24 hours after I became exposed to these tools and I tested some of them on my metal sheets. My first few attempts on the metal shaping was imperfect and requires improvements and planning sessions. It was necessary to be able to create references and marked lines before hammering on the metal sheeting.
Attending this workshop, learning, practicing and implementing these tools has increased my confidence for future planning and decision in terms of model making. Its great to be able to take these learnt skills, strategic planning and identify more diverse and innovative solutions or approaches when building architectural models. Small simple techniques can help us think more broadly and more creatively to identify novel and useful solutions to the problems and challenges we face in the public sector.

Monday 16 May 2016

Digital Making_Interdisciplinary Skin


I paired up with a landscape architecture student, and we simply exchanged adobe illustrator files of our laser cutting through the laptop. His chosen object is a rock which is an abundant material of earth’s resources and is the foundation of landscape architecture. Landscape architects work on structures and external spaces which is appropriate for this chosen object and to have a better understanding of the site and surrounding context.


The laser cutting process did a great job of cutting all the required pieces and I removed all of them out of the plywood frame.


I took all the pieces out of the plywood frame and began gluing them together.


I cut out a small piece of aluminium and began curving the metal sheet by using the roller machine which helps to give a nice smooth curve.


I had to roll the metal sheet a couple of times to get to the desired curve I wanted


I marked out the extra bit where it is unnecessary and began cutting with the tool machine shown above


I tried to wrap the curved aluminium sheet along the edge of the mold but it still needs a bit of bending. 

I marked out the edges where it needs bending and from there i tried to  and there are two edges shown above After bending the edges, i was able to fit nicely around the object. 


I began shaping the aluminium sheet by pounding on rigid fixtures and with the tools provided in the workshop.


Hammering the aluminium sheet was a difficult process as it was a small object to work with and the sheet kept slipping away from my hands. I had to hold the metal sheet firmly and tried to shape the metal sheet as close as possible to the object. 


Shaping the metal sheet along the bottom edge of the object was easy but wrapping the top was a struggle for me and it was very difficult. as i tried to shape the top around the mold, the bottom bit of the sheet would deform and go out of place, I had to go back and forth of hammering the top and reshaping the bottom which was a tedious process. 


This is the result of my first attempt. My first attempt was somewhat unsuccessful because I've used a thick metal sheet which was 2.5mm thick. I cut out another piece of aluminium and tried to shape it with a second attempt. 


 This time I've used a thinner piece of aluminium sheet about 1mm in thickness. 


I tried to wrap the metal sheet with the same processes from my first attempt.

i would say the third attempt was better than the previous attempt. I was able to gradually shape the sheet around the mold as the metal sheet was a lot thinner


Final


Monday 25 April 2016

Digital Making_Found Object

Found Object


I have included the works of great abstract artists for educational purposes and juxtaposed them against one of my own photo. I have used this type of juxtaposed relationship to create  a common idea about how the sum of the parts can equal the whole (the actual physical building) but that the whole  may look different as you are putting all the parts together bit by bit (my photographic vision of the building). 

I have chosen to model a camera is because architects depend on photographic images to convey a message or to legitimize their work and recognizing for their accuracy and precision, photographs could render architectural elements as never before. Architects began to design with photographic representation in mind and for good or bad the public began to understand the built world around them in photographic terms

Photography surpassed drawing as the preferred artistic medium for recording and presenting architecture. With the advancement of photographic technologies and the modernization of the built environment around the turn of the twentieth century came innovative representations of architecture. Compositions and photographic processes began to reflect the avantgarde and modernist sensibilities of the time, and photographs of buildings, churches, homes, and other structures often showcased these developments. Experimental and conceptual approaches toward the representation of architecture have been embraced by photographers. 

Digital Making_123D Catch

123D Catch 


App Installation

Autodesk 123D Catch is an app that allows the user to generate a 3D Model of any object by taking a series of photos from different angles. It will recognise the object through the captured photos and combine them to from a 3D model.


The first step in creating a 3D model is to install autodesk 123D Catch from the app store if you are using your phone. You can make any object of your own choosing. I used the app to render my camera with 3 easy steps.


Before attempting to take photos of the object, you will need to create an account by pressing the plus sign on the top right corner so that all scanned project are stored into the account.


Then begin taking multiple shots of the object in various angles and a full 360 capture of the object making sure each shot is clear and in focus. For faster processing make sure the background is not too cluttered with items and making sure the lighting is good for capturing photos.


It is important to take photos from the top view for the application to work properly.


Wait for the application to process and combine all the images together to form a 3D scanning of the model. It will take 10 - 20 minutes to render for my specific object. Depending on how many images you have, the process time may vary and may take longer for others.


Once this step is finished and the waiting is done, download the stl file form the account previously created on the Autodesk 123D Catch webpage.


It is now ready to import into Mesh Mixer to clean up all the unnecessary and excess pieces such as the surrounding items.


Digital Making_ Mesh Mixer

Mesh Mixer

Software Installation

There are many different applications that could help clean up your model such as Mesh Mixer. simply click on the download button for installation.


Clean Up


The next step after your installation of Mesh Mixer onto the computer. Discard all the unnecessary bits from the scanning produced by 123D Catch and retain the object as it is. Export this into an obj file for the next software application use which is 123D Make. 


Digital Making_123D Make

123D Make

Software Installation

After scanning the model through 123D Catch and discarding all the unwanted bits though mesh mixer, it is now ready for import into 123D Make to create various patterns of the object. This software allows you to generate templates of your desired model for laser cutting and assembly later.


Importing

Simply download Autodesk 123D make onto the computer and import the ojb file into this software. After loading into 123D Make and it is imported, there are different options of shaping this object through stacking, interlocking and radical techniques shown below. The software will generate a pretty good 3D model of the object for creating a solid contour.  


original

stacked slices

interlocking slices

radical slices

Previously I have used interlocking as a method of creating my mold for hammering. After my first attempt of laser cutting, I realized there was a problem with the interlocking hence I underwent with stacking which is a better approach. 


Preparation for laser cutting


The autodesk 123d make generated over 50 pieces which is not ideal for laser cutting.  it is expensive and too much to laser cut. you are able to define the number of templates for cutting. as a result I reduced the size of the model creating roughly 32 pieces with a maximum of 3 templates to cut. The final step is to export these templates as PDF files. Click on the 'Get Plans' Tab  and save them onto your usb or hardrive. 

The next step is to import these PDF files into Adove Illustrator to modify the settings for laser cutting. The dimension of the material sheet you choose to use should be 600X300 as it will fit perfectly onto the laser cutting machine. It is important to note that the outlines of the template should be red for actual cutting and blue for scouring shown above. The 123D make will produce an original template shown below which is not ideal for laser cutting.  In addition, the line weights should be set to 0.001 for the laser cutting machine to cut effectively. 


Digital Making_Laser Cutting

Laser Cutting


This step is very easy, I simply removed all the required pieces from the laser cutting and began stacking


it is best to stack and assemble all the cut out pieces once before attempting to glue them and making sure your pieces are not missing.


once you think you are ready, start stacking and gluing each piece together 


This is the final product with every piece glued together. I have rearranged all the pieces from the laser cutting in chronological order and glued each slice together to create a mold shown above